Google Indexing API: The Complete Setup Guide for Faster Indexing

If you publish a new page and wait two weeks for Google to notice it, you lose traffic, sales, and momentum. The google indexing api gives owners of job posting and livestream content a direct way to notify Google the moment a URL is created, updated, or removed. When it is configured correctly, a notification can trigger a fresh crawl within minutes instead of days. This guide is for site owners, SEOs, and developers who want a complete, plain language setup from zero to first successful submission, plus automation patterns you can keep.
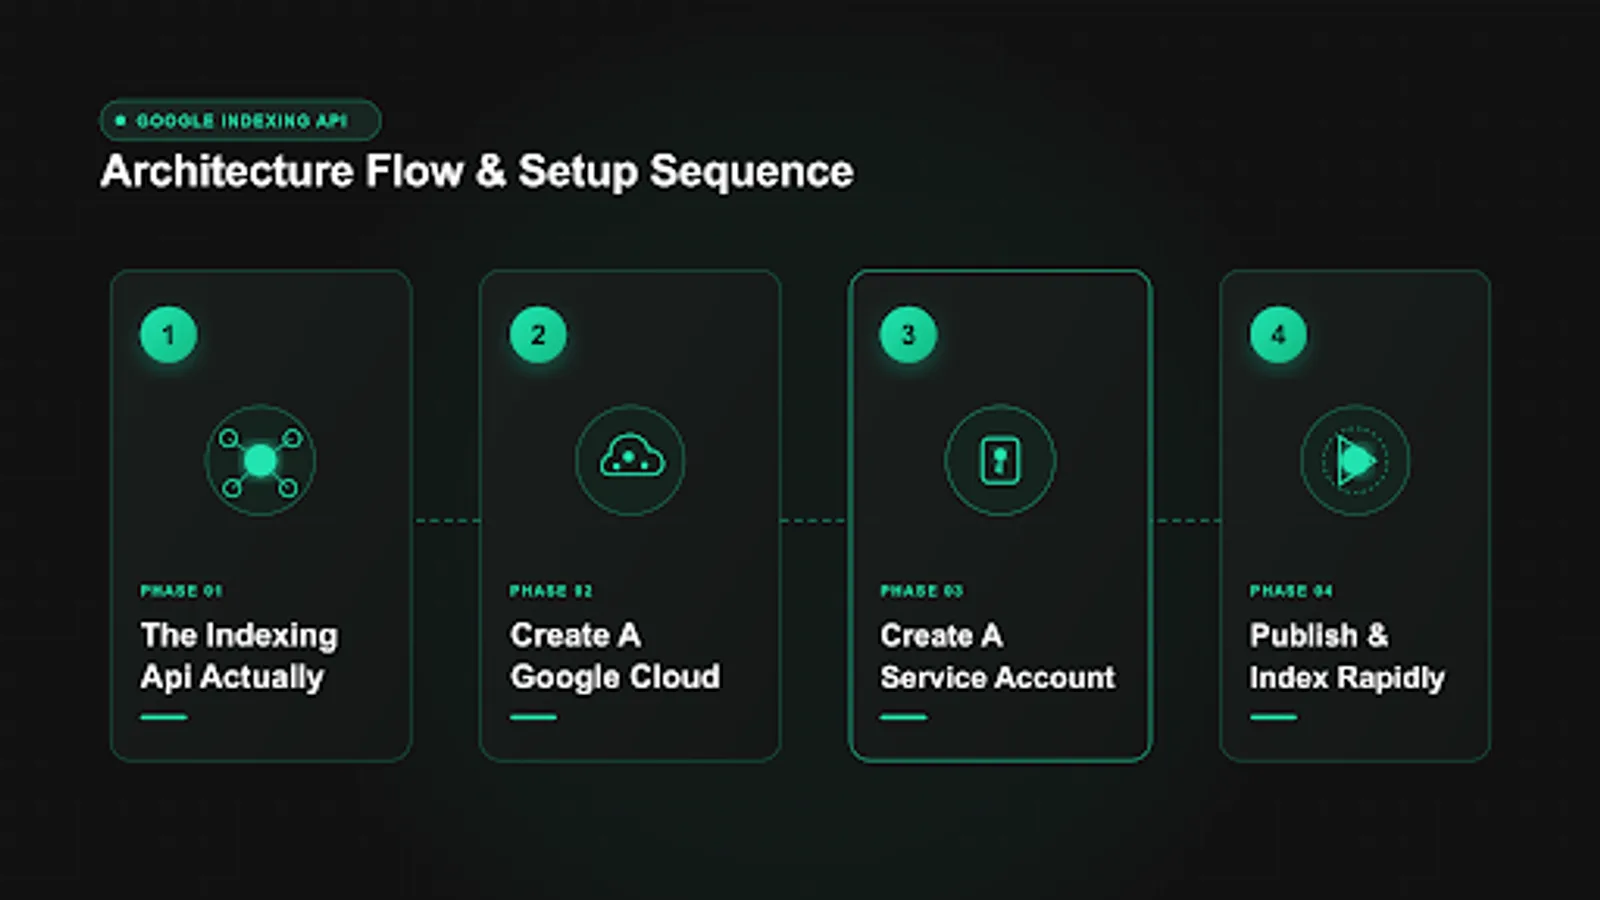
You will learn what the API can and cannot do, how to create a Google Cloud project, enable the API, create a service account, connect it to Search Console, and submit your first URL with cURL, Python, Node.js, and PHP. You will also see WordPress automation, quota rules, error handling, and monitoring. By the end you will be able to submit URLs on your own and explain every step to a teammate. The focus keyword for this guide is google indexing api, and every section builds toward a working setup you can trust.
Key takeaways
- The Google Indexing API notifies Google about JobPosting and BroadcastEvent URLs only, using URL_UPDATED and URL_DELETED actions.
- Setup has five parts: Cloud project, enabled API, service account with JSON key, Search Console ownership, and Owner permission for the service account.
- A first cURL test proves authentication works before you write application code in Python, Node.js, or PHP.
- Default quota is small, usually 200 requests per day per project, so queue and throttle bulk work and watch for 429 responses.
- Google does not support IndexNow, and the Indexing API is not a ranking tool. It requests a crawl. Indexing still depends on quality and eligibility.
- What the Indexing API actually does
- What you need before you start
- Create a Google Cloud project
- Enable the Indexing API
- Create a service account and JSON key
- Grant access in Search Console
- Submit your first URL with cURL
- Submit URLs with Python
- Submit URLs with Node and PHP
- Automate WordPress and CMS pipelines
- Monitor quota logs and results for google indexing api
- FAQ
- Sources
- Further reading
 <!-- IMAGE-PROMPT cover: 1200x630, DependsIt brand, deep charcoal #121212 background, vibrant mint #22E3B0 accent glow, thin node-network line art, Clash Display style bold heading space on left, General Sans clean labels, subject: Google Indexing API setup flowchart from Cloud project to service account to Search Console to URL submission, flat vector, high contrast, accessible, no photorealistic faces, no text smaller than 24px, no em dash in rendered text, export PNG then cwebp -q 82 to WEBP -->
What the Indexing API actually does and does not do
The google indexing api is a REST endpoint that lets you send Google a structured notification when a URL has changed. The endpoint accepts a JSON body with two fields: the full URL and a type value of either URL_UPDATED or URL_DELETED. Google then decides when to crawl that URL. The notification does not force indexing, does not guarantee a position, and does not bypass spam or quality checks. Think of it as raising your hand in a crowded room. Google still decides whether to look at you, but you no longer wait silently in the back.
Officially the API supports pages that contain JobPosting structured data and pages that contain BroadcastEvent structured data inside an IndexableOnAirDate or similar livestream markup. That scope matters. Many tutorials suggest using it for every blog post and product page. Google documentation describes the narrower scope, and you should understand the difference before you build on it. If your site publishes jobs or livestreams, you are inside the documented use case and you can proceed with confidence. If you run a blog, a store, or a corporate site, the API may still accept your notifications, but you are outside the documented scope. For an honest discussion of that off label pattern, read whether the Indexing API works for normal pages.
The practical benefit for supported content is speed. Job posts expire quickly. Livestreams start at a fixed hour. Waiting for a routine crawl can mean the opportunity passes before Google ever sees the page. A direct notification shortens discovery from days to minutes in many cases reported by publishers. It also helps with removals. When a filled job is taken down, a URL_DELETED notification asks Google to refresh its record promptly instead of showing an expired listing for weeks.
What the API does not do is equally important. It does not submit content to Google in the sense of uploading HTML. Google still crawls the URL with Googlebot. It does not replace sitemaps, internal links, canonical tags, or Search Console. It does not support bulk ranking boosts, and it does not work for Bing or other engines. Google does not support IndexNow, so if you need Bing, Yandex, Naver, or Seznam coverage you need a separate IndexNow workflow. A two engine setup is common: Indexing API for Google plus IndexNow for participating engines.
There are three actions you will use repeatedly. The publish method posts a notification. The getMetadata method checks the last notification Google recorded for a URL. The unfold is conceptual: update, delete, and status check. You will use publish most, getMetadata for debugging, and URL_DELETED when content is removed. Keep notification history in your own database too, because getMetadata only shows recent API activity, not full index state.
Before you invest time, confirm fit with this simple table.
| Question | Answer for this guide |
|---|---|
| Which Google endpoint | urlNotifications publish and getMetadata under indexing.googleapis.com |
| Supported types | JobPosting, BroadcastEvent with structured data |
| Notification values | URL_UPDATED when content is new or changed, URL_DELETED when removed |
| Guarantee | Crawl request only, no indexing or ranking promise |
| Bing coverage | None, use IndexNow separately |
| Cost | API calls are free, engineering and maintenance time is the real cost |
By the end of this section you should be able to explain the API in one sentence to a non technical owner: it tells Google that a specific job or livestream URL changed so Google can decide to recrawl it sooner. That shared understanding prevents disappointment later when someone expects instant ranking. Speed of discovery improves. Quality still decides indexing.
What you need before you start
A smooth setup depends on access and ownership, not just code. Gather these items before you open the Cloud console so you do not stall halfway through. You need a Google account that can create Cloud projects or access to an existing project where you have Editor or Owner rights. You need verified ownership of the site in Search Console at the exact property level you plan to submit, which means the domain property or the URL prefix property must match the URLs you will notify about. You need permission to add users in Search Console, which requires Owner role on that property. Without Owner rights you cannot delegate access to a service account, and every later step will fail with 403 errors.
You also need a place to store secrets. The service account JSON key is a password file. Anyone with that file can request quota against your project and attempt notifications for properties where the service account has access. Plan storage now: a secrets manager, an environment variable on the server, or an encrypted vault. Do not paste the key into chat tools, tickets, front end code, or public repos. Decide who can rotate the key and where the backup lives. If you work with vendors, decide whether they get the key at all. Many teams prefer a bring your own key pattern where the tool runs in their own account instead of sharing keys outward.
On the technical side, pick your submission language early. Python is the fastest path for most SEOs because the official client handles JWT signing. Node.js fits teams that already run JavaScript backends or edge functions. PHP fits WordPress and Laravel stacks. cURL is useful for manual testing even if you later automate in another language. You do not need all four in production. You need one tested path plus cURL for debugging. This guide shows all four so you can copy the one that matches your stack.
Checklist before you begin:
- Google account with Cloud project creation rights or Editor access to a target project
- Search Console property verified for the exact domain or prefix you will submit
- Owner role in Search Console so you can add the service account as Owner
- A server or local machine with Python 3.10 or later, or Node 18 or later, or PHP 8.1 or later
- Ability to install packages and set environment variables
- A secrets location for the JSON key file
- A short test URL on your own verified property, ideally a real job or livestream page
A note on domains and environments. The API authenticates with a service account email, not with your personal Gmail session. That means cron jobs, GitHub Actions, Cloudflare Workers with stored secrets, and Astro build hooks can all submit without interactive login. It also means local testing uses the same key file as production, so label your projects clearly, for example indexing-prod and indexing-test, to avoid mixing quotas. Quota is per Cloud project, not per key, so separate projects isolate testing from live traffic.
Time estimate for a first setup is 20 to 40 minutes if access is ready: about 5 minutes for the Cloud project, 3 minutes to enable the API, 5 minutes for the service account, 5 minutes for Search Console delegation, and 10 minutes for the first cURL test. Automation adds another hour. If you hit permission errors, most delays come from Search Console roles propagating slowly. Wait 10 to 15 minutes and retry before rebuilding keys. The error fixes for 403, 429, and JWT failures covers every common stall in detail.
Create a Google Cloud project from scratch
A Cloud project is a container for APIs, credentials, quotas, and logs. Every Indexing API call belongs to exactly one project, and quota is tracked per project. Create a dedicated project for indexing so usage is easy to monitor and so testing does not consume production quota. Avoid reusing a large shared project where other teams might change keys or disable APIs without telling you.
Step 1: Open the Cloud console and sign in with the account that will own the project. Go to the project picker at the top and select New Project. Give it a clear name such as Site Name Indexing Prod. The project ID is generated automatically with a numeric suffix. You can edit the ID before creation but not after. Choose an organization and billing account if prompted. The Indexing API itself does not require paid billing for normal use, but console prompts vary by account history. Standard quota is available without paid services.
Step 2: Wait for provisioning, then select the new project in the picker. Open IAM and Admin, then IAM, and confirm you are listed as Owner. Add a second owner if this is production, so access survives staff changes. Document the project number and project ID in your runbook. The project number appears in logs, the project ID appears in CLI commands. Both are safe to store in docs. Only keys and tokens are secret.
Step 3: Set up basic guardrails. Enable audit logging for IAM changes. Create a label such as purpose:indexing and env:prod so cost and usage reports are easy to filter later. If your company requires it, place the project inside the correct folder in the organization hierarchy now, because moving it later can reset policy inheritance and confuse access.
Common mistakes at this stage are easy to avoid. The first is creating the project under a personal Gmail when the company uses Workspace, which later blocks handover. The second is creating two projects by accident and enabling the API in one while creating keys in the other. The third is assuming quota moves with the key. It does not. Quota stays with the project where the API is enabled and where the OAuth client was created. If submissions report quota exceeded unexpectedly, confirm you are authenticating against the intended project ID.
For teams that prefer the command line, the same result takes three commands with the gcloud CLI. This snippet only creates and selects the project. Enabling the API comes next.
# Example: verify project selection with gcloud (run in terminal, not Python)
# gcloud projects create site-indexing-prod --name="Site Indexing Prod"
# gcloud config set project site-indexing-prod
# gcloud projects describe site-indexing-prod
// Node: no code needed at this stage. Record project ID for later auth.
// const PROJECT_ID = "site-indexing-prod";<?php
// PHP: no code needed yet. Store project ID in env for later use.
// putenv("GOOGLE_CLOUD_PROJECT=site-indexing-prod");# cURL: no API call yet. Confirm you can see the project.
# curl -H "Authorization: Bearer $(gcloud auth print-access-token)" \
# "https://cloudresourcemanager.googleapis.com/v1/projects/site-indexing-prod"If you already have a project for SEO tooling, you can reuse it, but a separate project is cleaner for quota tracking. The quota dashboard shows per method usage, and a dedicated project makes the graph readable. It also lets you revoke all indexing access by disabling one project without touching analytics or other integrations. For most small sites the difference is minor, but for agencies managing many clients, one project per client prevents one busy site from consuming shared quota and makes invoicing and audits simpler.
Enable the Indexing API in the API library
Enabling the API activates the urlNotifications methods for your project and makes quota visible in the console. Until you complete this step, every publish call returns a disabled or not found style error even with a valid key. The fix is a two minute toggle, but it is the most skipped step in failed setups.
In the console, open APIs and Services, then Library. Search for Indexing API or Web Search Indexing API. Select the result owned by Google and press Enable. Wait for the confirmation banner. Then open APIs and Services, then Enabled APIs, and confirm the Indexing API appears in the list. Open Quotas from that page and note the default limit for Publish requests per day and per minute. Typical new projects show 200 publish requests per day and a small per minute rate. Values can vary by account age and region, so record what you actually see instead of trusting blog screenshots.
If you manage projects with infrastructure as code, enable the service programmatically so staging and production match. The service name is indexing.googleapis.com. After enabling, allow a few minutes for propagation before testing. Immediate calls can return 403 with service disabled messages that clear on retry.
# Enable via gcloud
# gcloud services enable indexing.googleapis.com --project=site-indexing-prod
# gcloud services list --enabled --project=site-indexing-prod | grep indexing
Quota visibility matters from day one. Open the quota page and create an alert at 70 percent of daily publish usage. That alert gives you time to pause bulk jobs before you hit the hard cap and start dropping URLs. If you plan sustained volume above the default, you can request an increase from the quota page, but approvals are not guaranteed and can take days. Design your queue to live inside the default first, then request more only with real usage data. The companion guide on quota limits and how to stay under them shows monitoring queries and backoff patterns.
A quick verification table helps you confirm this stage before moving on.
| Check | Where | Expected |
|---|---|---|
| API listed as enabled | APIs and Services, Enabled APIs | Indexing API present |
| Quota visible | Quotas tab for the API | Daily publish limit shown |
| Service name | CLI or console details | indexing.googleapis.com |
| Propagation | Wait 3 to 5 minutes | No disabled error on first test |
Do not create keys until the API shows as enabled. Keys created earlier still work after enabling, but testing them before enabling produces confusing errors that look like auth failures when the real cause is a missing toggle. Order matters: project, then enable, then service account. That sequence saves most beginners at least one round of debugging.
Create a service account and download a JSON key
A service account is a robot identity with its own email address, for example indexing-publisher@site-indexing-prod.iam.gserviceaccount.com. Your code uses its private key to sign a short lived JWT, exchanges that JWT for an access token, and calls the API. No interactive login is needed, which is why cron and deploy hooks can submit automatically. You will create the account, grant it a minimal role, create a JSON key, and store that key securely. In practice this indexing api service account step is the core of the indexing api setup, because the email you create here is the identity you later delegate in Search Console.
In the console, open IAM and Admin, then Service Accounts, then Create Service Account. Name it indexing-publisher. Add a description such as Submits Indexing API notifications for job pages. Grant a basic role. For least privilege, no broad Cloud role is required for the Indexing API itself because authorization for URLs comes from Search Console delegation, not from Cloud IAM. Many teams assign no Cloud role or a minimal viewer role on the project and rely on Search Console Owner delegation for actual permission. Avoid assigning Editor or Owner Cloud roles to the robot unless another tool in the same project needs it.
Next, open the new service account, go to Keys, Add Key, Create New Key, JSON. The console downloads a file with private_key, client_email, token_uri, and project details. Treat this file as a password. Rename it clearly, for example indexing-prod-key.json, and move it to your secrets location. Set file permissions to owner read only on Linux with chmod 600. Record the key ID and creation date in your runbook so rotation is traceable. If the file is ever committed to git or pasted into a ticket, rotate immediately instead of trying to clean history.
Key hygiene rules that prevent most incidents:
- One key per environment. Prod, staging, and local each get their own key so you can revoke one without stopping everything.
- Expiry review every 90 days. Create a new key, deploy it, confirm submissions succeed, then delete the old key.
- No keys in client side bundles, Astro island props, or public repos. Server side only.
- Environment variable or secret manager in production, file path only for local dev.
- Log key ID with each deployment so you know which credential made each call.
The JSON file has a predictable shape. You never edit its fields by hand. You only point your code at its path or load its contents from a secret.
# Python: point the client at your key file via env var
# export GOOGLE_APPLICATION_CREDENTIALS="/secrets/indexing-prod-key.json"
import os
print(os.environ.get("GOOGLE_APPLICATION_CREDENTIALS"))
// Node: key file path via env, never hardcoded in source
// process.env.GOOGLE_APPLICATION_CREDENTIALS = "/secrets/indexing-prod-key.json";
console.log(process.env.GOOGLE_APPLICATION_CREDENTIALS);<?php
// PHP: read key path from env
// $keyPath = getenv("GOOGLE_APPLICATION_CREDENTIALS");
// echo $keyPath . PHP_EOL;If key creation fails with permission errors, your Cloud IAM role is too low. Ask a project Owner to grant Service Account Admin or to create the account for you. If the download succeeds but later calls fail with invalid grant or failed to parse JWT, the file was likely truncated, reflowed by an editor, or pasted through a chat tool that altered line breaks in the private key. Download a fresh copy and compare byte size before changing code. JWT problems are covered step by step in the JWT and permission error fixes guide.
 <!-- IMAGE-PROMPT diagram-01: 1600px max, DependsIt brand mint #22E3B0 on charcoal #121212, node-network line art, subject: service account JSON key to JWT signing to OAuth access token to Indexing API publish flow diagram, flat vector, accessible, no em dash, Clash Display style headings, General Sans clean labels -->
Verify ownership and grant access in Search Console
This is the step where most setups fail. The API authenticates as the service account, but Google authorizes each URL against Search Console permissions. The service account email must be added as an Owner on the exact Search Console property that contains the URLs. Editor, Viewer, or delegated user roles are not enough for all operations. Without Owner delegation, publish calls return 403 permission denied even when the JWT and project are perfect.
First confirm verification. Open Search Console, select your property, and check Settings. If you use a domain property such as example.com, it covers all subdomains and protocols. If you use a URL prefix property such as https://example.com/jobs/, only URLs under that prefix are eligible. Your test URL must live under the verified property. A common error is verifying https://example.com but submitting https://www.example.com/job/123 when only one variant is verified. Domain properties avoid this class of bug, so prefer them for new setups.
Next, delegate access. In Search Console, open Settings, then Users and permissions, then Add user. Paste the full service account email from the JSON key client_email field. Select Owner and confirm. The invite takes effect quickly but permission caches can lag. Wait 10 to 15 minutes before your first test if you want to avoid a false 403. Keep a screenshot of the users list for your runbook with the date. If your property uses delegated ownership through DNS or Workspace admin, confirm the Owner entry persists after a day. Some setups show a temporary Owner that drops if domain verification lapses.
Use this checklist to confirm readiness:
- Property verified and stable for at least 24 hours
- Service account email listed as Owner, spelled exactly, no extra spaces
- Test URL belongs to that property, same host and protocol and path prefix
- Cloud project has Indexing API enabled
- Key file matches the delegated service account email
Multi site agencies need a repeatable pattern. Create one service account per client project or one central account added to each client property, then document which you chose. One account per client isolates revocation and quota. One central account simplifies code but creates blast radius if the key leaks. Most agencies choose per client for production and one shared account for internal testing. Whichever you choose, maintain a table of property to service account to Cloud project so on call staff can trace a 403 in seconds.
If you see 403 after correct delegation, check three things in order: wrong property level, cached permissions, and URL mismatch such as trailing slash or http versus https. The API compares the exact URL string you send with Search Console coverage. Normalize URLs before submitting: enforce https, enforce one host variant, strip tracking parameters, and keep or remove trailing slashes consistently. A canonical tag that points elsewhere does not block the notification, but it changes what Google indexes, so align submitted URLs with canonicals.
Submit your first URL with cURL
A manual cURL test proves the whole chain works before you add client libraries. You will create a JWT, exchange it for an access token, then publish one notification. On most Linux and macOS machines you can do this with gcloud handling auth, which avoids hand rolling JWT on the first run. If gcloud is not available, the Python and Node sections below show direct JWT signing.
The fastest verified path uses an OAuth access token derived from your service account key. Activate the service account with gcloud, print a token, then call publish. Replace the example URL with a real URL on your verified property. Keep the JSON body small and exact. The type field is case sensitive and must be URL_UPDATED or URL_DELETED.
# Authenticate gcloud as the service account (one time per machine)
# gcloud auth activate-service-account --key-file="/secrets/indexing-prod-key.json"
# gcloud config set project site-indexing-prod

# Get a short lived access token
# ACCESS_TOKEN=$(gcloud auth print-access-token)

# Publish one URL_UPDATED notification (replace URL with your own)
# curl -s -X POST \
#   -H "Content-Type: application/json" \
#   -H "Authorization: Bearer $ACCESS_TOKEN" \
#   -d '{"url": "https://example.com/jobs/senior-nurse-night-shift", "type": "URL_UPDATED"}' \
#   "https://indexing.googleapis.com/v3/urlNotifications:publish"

# Check last notification status for that URL
# curl -s \
#   -H "Authorization: Bearer $ACCESS_TOKEN" \
#   "https://indexing.googleapis.com/v3/urlNotifications/metadata?url=https://example.com/jobs/senior-nurse-night-shift"
Expected success looks like a JSON object with urlNotificationMetadata containing the URL, latestUpdate with type URL_UPDATED and notifyTime timestamp. Expected metadata lookup returns the same URL with recent update info. If you see an error object instead, read the code field first. A 403 with permissionDenied points to Search Console delegation. A 401 with invalid credentials points to token or key problems. A 429 points to quota. A 400 with invalid URL points to malformed input or a URL outside your property. Copy the full error JSON into your log with a timestamp. It contains the detail you need for targeted fixes.
Tips for a clean first test:
- Use a real page that returns 200, has indexable content, and includes JobPosting or BroadcastEvent markup if you want to stay inside documented scope.
- Submit the canonical URL exactly as users and sitemaps reference it.
- Send one URL, not ten. Confirm one success end to end, then scale.
- Save the request and response pair in your runbook as a known good example.
- Verify in Search Console URL Inspection after 10 to 30 minutes that crawl activity was recorded.
If cURL succeeds, your project, API toggle, key, delegation, and URL are all correct. Every later failure in application code is then a code bug, not an account bug, which narrows debugging dramatically. If cURL fails, fix access before writing more code. Rebuilding clients on top of broken permissions only adds noise. For comparison with the manual Search Console button, see Indexing API versus Request Indexing to decide when each path is appropriate.
Submit URLs with Python copy paste script
Python is the most reliable starting point because the official google-api-python-client and google-auth libraries handle JWT creation, token refresh, and retries with minimal code. Install two packages, point the client at your JSON key, and call publish. The script below submits one URL, prints the response, and checks metadata. It also shows basic handling for 403 and 429 so you learn the failure modes early. If you followed a google indexing api tutorial before, this indexing api setup mirrors the same steps while showing how google indexing api python handles indexing api jwt signing and how to submit url to google api for one test URL.
Prerequisites are Python 3.10 or later and pip. Create a virtual environment to avoid polluting system packages. Store the key path in GOOGLE_APPLICATION_CREDENTIALS and the target URL in an argument or env var. Never hardcode the key contents in source.
# pip install google-api-python-client google-auth
import os
import sys
from google.oauth2 import service_account
from googleapiclient.discovery import build
from googleapiclient.errors import HttpError

KEY_PATH = os.environ.get("GOOGLE_APPLICATION_CREDENTIALS", "/secrets/indexing-prod-key.json")
SCOPES = ["https://www.googleapis.com/auth/indexing"]

def get_service(key_path=KEY_PATH):
    creds = service_account.Credentials.from_service_account_file(key_path, scopes=SCOPES)
    return build("indexing", "v3", credentials=creds, cache_discovery=False)

def publish_url(service, url, kind="URL_UPDATED"):
    body = {"url": url, "type": kind}
    return service.urlNotifications().publish(body=body).execute()

def get_metadata(service, url):
    return service.urlNotifications().getMetadata(url=url).execute()

if __name__ == "__main__":
    target = sys.argv[1] if len(sys.argv) > 1 else "https://example.com/jobs/senior-nurse-night-shift"
    svc = get_service()
    try:
        resp = publish_url(svc, target, "URL_UPDATED")
        print("PUBLISH OK:", resp)
        meta = get_metadata(svc, target)
        print("METADATA:", meta)
    except HttpError as e:
        print("HTTP ERROR:", e.status_code, e.error_details if hasattr(e, "error_details") else e)
        print("Check Search Console Owner delegation on 403, quota on 429.")
Run it with one argument for the URL. Start with a single job URL, confirm PUBLISH OK, then call getMetadata to see notifyTime. Log both outputs with timestamps. For bulk work, wrap publish_url in a loop that reads URLs from a file, sleeps between calls, and writes successes and failures to separate CSV files. A safe starting pace is one request every 5 to 10 seconds, which stays well under per minute limits and gives you readable logs. Add exponential backoff on 429: wait 60 seconds, then 120, then 240, then stop and resume the next day if quota is exhausted. Never retry 403 in a tight loop. It will not clear without an access fix.
A minimal queue file pattern looks like this in practice: urls.txt with one canonical URL per line, done.csv with timestamp, URL, and response ID, failed.csv with timestamp, URL, code, and message. That trio lets you resume after quota resets without resubmitting successes. For larger jobs, move the queue into SQLite or your CMS database with columns for status, attempts, last error, and next retry time. The full bulk pattern with throttling and quota math is detailed in the quota limits guide linked under Further reading.
Validate page eligibility before submitting at scale. Fetch each URL and confirm it returns 200, is not blocked by robots.txt, has no rogue noindex, and contains the expected JobPosting or BroadcastEvent JSON-LD when you claim documented use. Submitting deleted pages with URL_UPDATED wastes quota. Submitting live pages with URL_DELETED can remove useful listings. A preflight check of status code plus structured data presence prevents both mistakes and keeps your notification history clean.
Submit URLs with Node.js and PHP
Teams on JavaScript or PHP stacks do not need to switch languages. The same OAuth flow works everywhere: sign a JWT with the service account key, exchange it for an access token scoped to indexing, then POST JSON to the publish endpoint. The snippets below are minimal but complete enough to copy into a utility file and run.
Node.js uses google-auth-library for signing and fetch or axios for HTTP. Install the auth package, load the key file from env, request a client with the indexing scope, then publish. The example includes metadata lookup and typed error logging so failures are actionable.
// npm install google-auth-library
// Node 18+ has global fetch. Use node --env-file or export env vars.
import { JWT } from "google-auth-library";

const KEY_FILE = process.env.GOOGLE_APPLICATION_CREDENTIALS || "/secrets/indexing-prod-key.json";
const SCOPE = "https://www.googleapis.com/auth/indexing";

async function getAccessToken() {
  const client = new JWT({ keyFile: KEY_FILE, scopes: [SCOPE] });
  const tokens = await client.authorize();
  return tokens.access_token;
}

async function publishUrl(url, type = "URL_UPDATED") {
  const token = await getAccessToken();
  const res = await fetch("https://indexing.googleapis.com/v3/urlNotifications:publish", {
    method: "POST",
    headers: { "Content-Type": "application/json", Authorization: "Bearer " + token },
    body: JSON.stringify({ url, type })
  });
  const data = await res.json();
  console.log(res.status, JSON.stringify(data));
  return { status: res.status, data };
}

// Example: node submit.mjs https://example.com/jobs/senior-nurse-night-shift
const target = process.argv[2] || "https://example.com/jobs/senior-nurse-night-shift";
await publishUrl(target, "URL_UPDATED");
PHP uses firebase/php-jwt or google/auth plus cURL. Many WordPress hosts already have cURL enabled but block shell exec, so a pure PHP implementation with file_get_contents or curl functions is more portable than shelling out. The example below uses google/auth for signing to avoid hand building JWT, then posts with cURL. Install with Composer.
<?php
// composer require google/auth
require __DIR__ . '/vendor/autoload.php';

$keyPath = getenv('GOOGLE_APPLICATION_CREDENTIALS') ?: '/secrets/indexing-prod-key.json';
$target = $argv[1] ?? 'https://example.com/jobs/senior-nurse-night-shift';

$auth = new Google\Auth\Credentials\ServiceAccountCredentials(
    'https://www.googleapis.com/auth/indexing',
    json_decode(file_get_contents($keyPath), true)
);
$token = $auth->fetchAuthToken()['access_token'] ?? null;
if (!$token) { fwrite(STDERR, "Failed to fetch access token\n"); exit(1); }

$ch = curl_init('https://indexing.googleapis.com/v3/urlNotifications:publish');
curl_setopt_array($ch, [
    CURLOPT_POST => true,
    CURLOPT_RETURNTRANSFER => true,
    CURLOPT_HTTPHEADER => ['Content-Type: application/json', 'Authorization: Bearer ' . $token],
    CURLOPT_POSTFIELDS => json_encode(['url' => $target, 'type' => 'URL_UPDATED']),
    CURLOPT_TIMEOUT => 30,
]);
$body = curl_exec($ch);
$code = curl_getinfo($ch, CURLINFO_HTTP_CODE);
curl_close($ch);
echo $code . ' ' . $body . PHP_EOL;
Astro sites often submit at build time or via an API route. A build hook can collect new job slugs from a content collection, then call the publish endpoint for each changed URL after deploy. Keep the key server side only, never in client islands. A server endpoint at /api/notify-indexing can accept a slug, construct the canonical URL, and publish with the same JWT logic. Rate limit that endpoint and require authentication so public visitors cannot burn your quota. Cloudflare Workers follow the same pattern with secrets stored as encrypted environment variables.
Choose one primary language for production and keep cURL for manual checks. Two implementations that drift apart cause subtle bugs, such as one normalizing trailing slashes and the other not. Centralize URL normalization in one helper: enforce https, lowercase host, strip utm parameters, collapse duplicate slashes, and preserve or remove trailing slash consistently with your canonicals. Log normalized URL, type, response code, and notifyTime for every call. Those four fields answer almost every later question about what was sent and what Google acknowledged.
 <!-- IMAGE-PROMPT workflow-02: 1600px max, DependsIt brand, deep charcoal #121212 background, vibrant mint #22E3B0 accent glow, thin node-network line art, subject: CMS publish event to submission queue to throttled Indexing API worker to Google crawl workflow, flat vector, accessible, no em dash, Clash Display style headings, General Sans clean labels -->
Automate submissions from WordPress and CMS pipelines
Manual submission works for testing, but value comes from automation that fires the moment content changes. The pattern is the same across WordPress, headless CMS, and static builds: detect create, update, or delete events, normalize the URL, push it to a queue, and let a throttled worker publish to Google with retries. Direct synchronous calls inside the request handler are fragile. If Google is slow or quota is exhausted, the editor sees a delay or an error. A queue decouples publishing from notification and lets you retry safely.
For WordPress without a plugin, hook into publish and trash events in your theme or a small custom plugin. On transition_post_status or publish_job style hooks, check post type, confirm public visibility, build the permalink, and insert a row into a custom queue table or schedule a single cron event with the URL as argument. A separate cron worker reads the queue every 5 minutes, sends up to N notifications per run, and marks rows done or failed with error codes. Store the service account JSON outside the web root and load it by path. Restrict the settings page to administrators. Teams asking about google indexing api wordpress automation often compare the google url submission api path with the simpler google index api label used in forums, and they ask whether the google indexing api free quota covers daily publishing without extra cost.
For headless CMS and static sites, use webhooks. Contentful, Sanity, Strapi, and similar platforms can POST to your endpoint on publish, unpublish, and delete. Your endpoint validates a shared secret, maps content type to URL, and enqueues URL_UPDATED or URL_DELETED accordingly. On deploy, an Astro build script can diff the sitemap between builds and enqueue only changed URLs instead of resubmitting everything. That diff saves quota on large sites where full resubmission would exceed daily limits in one run.
Queue design that survives real traffic has five columns at minimum: url, type, status, attempts, and next_retry_at, plus last_error and response_id. Worker logic is simple: select up to 20 pending rows where next_retry_at is past, publish one every 6 seconds, update status to sent with notifyTime on 200, set failed with error code on 4xx, and schedule retry with exponential backoff on 429 and 5xx. Cap attempts at 5, then park the row for manual review. Alert when pending depth exceeds 500 or when daily sent count reaches 70 percent of quota. Those two alerts catch stuck workers and runaway loops before quota is gone.
Safety rules for automation:
- Only submit canonical, indexable URLs that return 200 for URL_UPDATED.
- Send URL_DELETED only when the page is gone or returns 404 or 410, or when a job is truly filled and removed.
- Never submit paginated archives, faceted filters, or internal search URLs. They waste quota and dilute signals.
- Deduplicate by normalized URL so rapid edits do not send five notifications for one page.
- Pause automation during migrations and staging syncs to avoid notifying about temporary hosts.
Test automation with a staging property first. Publish a test job, confirm the queue row appears, run the worker manually, verify 200 and notifyTime, then check URL Inspection for crawl activity. Promote to production only after three clean cycles. Document runbook steps for pausing the worker, purging the queue, and rotating the key. Automation that no one can pause safely becomes a liability during incidents.
Monitor quota logs and results for google indexing api
Submitting without monitoring is flying blind. You need three views: quota consumption in Cloud console, per URL outcomes in your own logs, and crawl and index effects in Search Console. Together they tell you whether notifications are sent, accepted, and useful.
Start with quota. In Cloud console, open the Indexing API quotas page and watch Publish requests per day and per minute. Note your effective limit and reset time, which is typically midnight Pacific Time but should be confirmed in your console. Create alerts at 70 and 90 percent. Track usage per day in a simple table so trends are visible: date, sent, 429 count, 403 count, pending at midnight. If sent grows 10 percent week over week, forecast when you will need throttling or an increase request. The detailed math and recovery playbook for quota issues is covered in the companion quota guide.
Next, log every call with enough fields to debug without reproducing. Minimum fields are timestamp, normalized URL, type, HTTP status, error code if any, notifyTime on success, key ID, and project ID. Store logs for at least 30 days. A daily summary query shows success rate, top error codes, and retry depth. If 403 spikes, delegation changed. If 429 spikes, pacing failed. If 400 spikes, URL construction broke. Each pattern has a different owner and fix, so the distinction matters.
Finally, measure effect in Search Console. URL Inspection shows last crawl time and crawl method for a single URL. The Pages report shows indexing trends for groups. Crawl stats show total crawl requests over time. Compare median time from publish to first crawl before and after automation for a sample of 20 to 50 URLs. A healthy setup shortens discovery noticeably for supported content while leaving quality driven indexing unchanged. Do not expect every notified URL to index. Expect faster decisions, faster crawls for eligible pages, and faster removal for deleted pages.
| Signal | Healthy | Investigate |
|---|---|---|
| Daily 200 rate | Above 95 percent | Below 90 percent for two days |
| 429 count | Zero on normal days | Any sustained run during business hours |
| 403 count | Zero | Any occurrence, check delegation immediately |
| Pending queue at midnight | Near zero | Growing three days in a row |
| Time publish to crawl | Minutes to hours for jobs | Days with no change after success |
Common operational mistakes include monitoring only Cloud quota without per URL logs, which hides which content fails, and monitoring only Search Console without quota, which hides why submissions stopped. Keep all three. Review weekly for small sites and daily during launches. Rotate keys on schedule, prune completed queue rows monthly, and keep the runbook updated with project ID, property URL, service account email, quota limit, and alert thresholds. A new team member should be able to diagnose a stall in 10 minutes from docs alone.
External references for endpoint behavior and structured data requirements stay limited to official docs. See the Google documentation on crawling and indexing and the JobPosting definition for markup fields that make job pages eligible.
FAQ
Does the Indexing API guarantee my page will be indexed?
No. It requests a crawl. Google still applies quality, duplication, and eligibility checks before indexing. Supported job and livestream pages that are crawlable, unique, and correctly marked up benefit most. Thin, duplicated, or blocked pages can receive a successful notification response and still remain unindexed. Use the API to speed up decisions, not to override them.
How many URLs can I submit per day?
Most new projects allow about 200 publish requests per day plus a small per minute rate. Your exact limit appears on the API quotas page in Cloud console and can vary. Each publish or metadata call counts. Plan queues inside that cap, deduplicate URLs, and alert at 70 percent. Increase requests are possible but not guaranteed.
Can I use the Indexing API for blog posts and product pages?
The documented scope is JobPosting and BroadcastEvent pages. The endpoint may accept other URLs, but that use is outside documented support and results vary. If you manage a blog or store, prioritize sitemaps, internal linking, and Search Console workflows first, and read the honest assessment for normal pages before building bulk jobs.
Why do I get 403 permission denied with a valid key?
Almost always because the service account email is not an Owner on the exact Search Console property for the URL. Check property level, host and protocol match, spelling of the email, and propagation delay. Also confirm the API is enabled in the same project that owns the key. Full steps for 403 and JWT errors are covered in the dedicated error fixes article.
Should I use URL_UPDATED or URL_DELETED?
Send URL_UPDATED when a page is new or its content changed in a meaningful way and the URL returns 200. Send URL_DELETED when the page is removed and returns 404 or 410, or when a job is filled and the listing is intentionally gone. Do not send URL_DELETED for live pages and do not send URL_UPDATED for deleted pages. Mismatched types confuse crawl scheduling and waste quota.
Is the Indexing API free?
Calls are free within quota. The real costs are engineering time to build and maintain the integration, monitoring, key rotation, and handling errors. For low volume job boards the total is small. For large multi site setups, queue infrastructure and ongoing maintenance dominate. Budget for both build and upkeep, not just API calls.
Where can I find a practical google indexing api tutorial for my stack?
Start with a short google indexing api tutorial that matches your stack instead of reading generic overviews. For most teams the best entry is google indexing api python because the official client handles indexing api jwt signing, token refresh, and retries with little code. Create a test project, enable the API, create a service account, delegate Search Console access, then run the indexing api setup steps in order and submit url to google api for one canonical job URL. Log notifyTime and metadata, confirm one success, then copy the same pattern to Node or PHP only if your production stack requires it.
Is the google indexing api free for daily use, and how does the google index api label relate to the google url submission api?
Yes, use of the google indexing api free quota is free within limits, usually about 200 publish requests per day per project, so small job boards can operate without API fees. The confusion around the google index api label comes from forum shorthand. The official name is the Indexing API, while google url submission api is a descriptive phrase owners use for the publish endpoint that lets you submit url to google api for one URL at a time. Calls are free, but engineering time for queues, monitoring, key rotation, and error handling is the real cost to budget.
Sources
- https://developers.google.com/search/docs/crawling-indexing/overview
- https://developers.google.com/search/docs/appearance/structured-data/job-posting
- https://schema.org/JobPosting
- https://developers.google.com/search/docs/monitor-debug/search-console-start
- https://www.indexnow.org/documentation